
The search for car seats should not be left to chance, and the NHTSA understands this. With different kinds of car seats available, in different design configurations, from infant to convertible seats and brands, choosing which one to use for your children can be stressful and frustrating. And being a responsible car owner does not end in choosing the right kind of car seats, it is also important to know how to use and install these seats, and understand when to replace the seats to meet your child’s age and size.
This guide will help you make sense of the different kinds of car seats, and help you install and use the right car seats for comfort and safety.
Step One: Choosing from among the different kinds of car seats based on the following criteria:
- Types of car seats available
- Car seat recommendations based on age and body sizes
- Choosing the appropriate car seat
- Using ease-of-use ratings of car seats
Step Two: Understanding the recommended and right ways of installing car seats:
- Step-by-step process in installing car seats
Step Three: Registering your chosen car seats
- Step-by-step process on how to register your chosen car seats
Part One: Types of Car Seats Available
Understanding the different types of car seats can help you find what’s best and appropriate for your children. To ensure an informed selection, consider the following factors:
- Pay attention to the growth and development of your children. The change in height and body structure will influence how they will sit in the vehicle. Consider using car seats that will accommodate the size and shape of the body of your children.
- You will not find “universal car seats” in the market. Car seats may vary in both size and design, thus it pays to check how the preferred car seats will fit in the vehicle.
- Select car seats that can fit securely in your car.
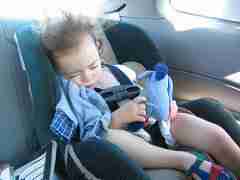
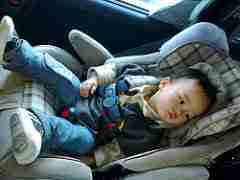
A. Rear-Facing Car Seats
When it comes to safety and comfort, the rear-facing auto seats are recommended for children in the car. Each rear-facing auto seat will feature a harness that will keep your child in place, and in an event of an accident, it protects your child from potential injuries, like injuries to the spinal cord and neck.
Here are the different types of rear-facing auto seats available:
- Rear-facing auto seats for newborns and infants- Configured as a rear-facing seat only, this type of auto seat is designed for newborn and infants. The seat is portable and small, offering just the perfect support for their fragile bodies. Unfortunately, these kinds of auto seats can only be used from 8 to 9 months, and after such time, a much larger and secure seat is required. For this reason, experts recommend the use of the all-in-one or convertible auto seats, and to configure these as rear-facing seats.
- Convertible auto seats- Compared to the rear-facing seats for infants, a convertible seat can be used both as a rear-facing and forward-facing auto seat using tethers and harness’s, and can be used by children of different weight and sizes. And since this car seat can be used by kids of different ages and sizes, your child can stay seated facing the rear for a longer period of time.
- All-in-one auto seats- This is a highly flexible car seat which can be changed from forward-facing seat to rear-facing-seat, and into a booster seat when your child grows. This works best for families who prefer a rear-facing seat that can also accommodate kids of different age and weight.
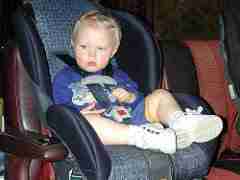
B. Forward-Facing Car Seats
These types of seats are designed for safety, thanks to the use of tethers and harness’s that help limit their movements in case of accidents. Here are the different types of forward-facing auto seats in the market:
- Convertible auto seats-These are highly flexible seats, which can be installed as a rear-facing or forward-facing seats, complete with tether and harness.
- Combination auto seats- These types of seats are originally designed as forward-facing seats, and can be transformed as a rear-facing one to meet the needs of your growing child.
- All-in-one auto seats- These are flexible seats that can assume the role of a forward-facing, rear-facing and a booster seat to meet the demands of your growing kids.
C. Booster Car Seats
When using booster auto seats, it’s recommended to secure it properly, covering the stronger body parts. Here are the different types of booster seats for cars.
- Boosters with high back- This type of seat is designed to give your child a height boost, and should work for cars that are not fitted with high seat backs or head rests. It’s design also allows protection for the child’s neck and head.
- Backless booster seat- This is also configured to provide your child with an extra boost in height, without the usual support for the neck and the head. Choose this seat type if your car’s seats are designed with head rests.
- Combination type- Designed to be flexible, a combination type can be made a booster when your child grows up.
- All-in-one car seats- As a flexible car seat, this can be used as a rear-facing, forward-facing and booster seat for your child when they grow up.
D. Seat Belts
The safety and efficiency of seat belts ultimately depend on how well these are installed and used. Wear the seat belts in such a way that it will provide a snug coverage on the chest and shoulder to restrain the passenger, and also covering the upper thighs. The belts should not pass through the neck, or the stomach area of the passenger.
Part Two: Car Seat Recommendations, Based on Age and Child Size
Car seats come in different types and design configurations which will make the search frustrating. To help you make sense of the options, use the following guide in choosing the best car seat for your child.
A. Rear-facing Car Seats
Birth to 12 months in age
This type of car seat is recommended for infants up to 12 months. There are three types of rear-facing auto seats for your child- infant-only, convertible and all-in-one auto seats. Convertible and the all-in-one seats are known for higher height and weight limits, thus you can use these seats as rear-facing seats for a longer period of time.
1 to 3 years in age
At the toddler stage, it’s still recommended to use rear-facing seats, and this serves as the safe option until he or she reaches the age or height limit spelled out in the factory-supplied car seats guidelines. Once your child has outgrown this type of seat, you may need to transition to a forward-facing car seats.
B. Forward-facing Car Seats
1 to 3 years in age
Experts suggest using the rear-facing seats when possible. But once your child has outgrown this type of seat, experts recommend a transition to forward-facing seats that are designed with tether and harness. Kids should remain in the rear-facing seats for the longest possible time, or until such time that he grows to an age where a new type of seat is recommended. Once the rear-facing seats can no longer do the job, it pays to invest in the forward-facing seats.
4 to 7 years in age
Experts recommend the use of forward-facing auto seats until such time the child can be accommodated in the car seats. Once he outgrows the forward-facing seat, then it is best to transition to the booster seat, but still occupying the back seat.
C. Booster Car Seats
4 to 7 years in age
It is recommended that your children should use the forward-facing seats fitted with the tether and harness, until such time that they reaches the top height or weight limit. Once your child has outgrown the forward-facing seats, then that’s the time to use the booster seats, but be sure that they are still positioned in the back seat.
8 to 12 years in age
Experts recommend using the booster seats until such time that children can properly fit in the seat belt. Seat belts should be properly fitted, where the belt covering the upper thighs, and the shoulder belt passing across the shoulders and chest. Again, children will need to stay in the back seat for safety reasons.
D. Seat Belts
Children should remain in the booster seats until they can comfortably sit with a seat belt on. Seat belts should be properly used, and should cover the upper thighs and not the stomach, and should run across his shoulder and chest, not the neck or face. They should also occupy the seats in the back seat.
- When it comes to choosing a car seat, make sure to take into account their age and size. The seat should comfortably fit in the car, and should be used at all times.
- Take time to read the manufacturer’s manual that comes with the seat. Pay attention to the height and size limits, and also learn more about the steps on how to install and use the tether, seat belts and lower anchors.
- For safety reasons, children should remain in the car seat for the longest possible time, and they should always occupy the back seat until the age of 12.
To make an informed choice on what type of seat should be chosen for your child, check on the complete list of recommendations from NHTSA.
Part Three. Ease-of-Use Ratings for Car Seats

To allow convenient evaluation of commercial car seats available, the NHTSA has prepared a system of ratings. Use this system of ratings when making an informed decision on whether to buy a car seat or not.
Can Car Seats Provide Your Family the Protection It Needs?
Once the car seats have been rated and assessed by the NHTSA, it means that these seats have passed Federal Safety Standards, thus can offer the protection you need on the road. While all these are ‘rated safe’, commercial car seats will differ in terms of use, based on a number of categories:
1. How instructions were worded and prepared- The office takes a look at the content of the manual, focusing on the clarity of steps to be taken by the car owner in using the manual.
2. Ease of installation in the vehicle- Focuses on how the features of the seat belts and child restraints are explained using clear words and instructions.
3. Checking of labels- Examination of the content of labels, if these are easily understood and clear.
4. Effectiveness in securing your examination of the effectiveness of the car seats in providing secure support to your child.
NHTSA Rating Scale for Ease of Use
To help you make sense of the ease-of-use qualities of car seats, NHTSA has come up with a rating scale, from 1 Star to 5 Stars, based on the identified four criteria.
5 Stars= Excellent features under the category
4 Stars= Above-average features under the category
3 Stars= Average features under this category
2 Stars= Below-average features under this category
1 Star= Poor features under this category
N/A= Does not contain any features under this category
Use the Ease-of-Use Car Seat Ratings Using the Type of Car Seats
Part Four: Guide to Installing Car Seats, By Type
For complete safety and protection, it best to install the car seat correctly, based on manufacturer suggestions. Different car seats will feature different installation instructions, thus it’s best to understand the suggested steps. Read first the installation tips provided by NHSTA, and after understanding the tips, proceed with the installation tips, by type below.
A. Installation By Type: Rear-Facing
A.1. Step-by-Step Process on How to Install Rear-facing Auto Seats for Infants
To ensure that the seat of the infant is property installed and secured, it is best to watch the posted Video and check out the following tips listed in this guide. The most comprehensive information and guide can be found on the car seat manual that comes with the car seat. While different car seats will call for specific installation steps, always keep a few things in mind:
- Car seats for infants should only be used as rear-facing, and not for forward-facing
- These seats should be installed in your car’s back seat.
Best Way to Install Seat Base with Seat Belt
1. Start by reading the manual that comes with the purchased car seat. Never attempt to install and use the car seat without reading the information and other details about the seat belt system, and the steps to lock the child’s seat belt. Keep in mind that seats and vehicles will vary, thus it pays to extend special attention to the contents of the manual.
2. Bring your car seat base to the back of your car.
3. Thread the seat belt by following the rear-facing seat belt path. The seat belt should be free from damage or wear.
4. Buckle and lock the seat belt.
5. Apply force on the car seat base to tighten the hold. This will help secure the base, and avoid loose movements when driving the car.
6. Check the recommended recline angle, and adjust accordingly.
7. When it’s time for the infant to join you, make sure that he is seated in a semi-reclined position to allow him to breathe easily.
8. Popular brands of car seats will feature angle indicators that can tell you if the seat is already in the recline position.
9. The suggested recline angle may be re-adjusted depending on the needs of your baby.
10. Once the base has been securely attached, you can then attach the carrier.
Learn How to Properly Fit your Child
1. Allow your child to sit with his back against the car seat.
2. Use the harness straps to secure his/her shoulders, making sure that the straps are flat and never twisted. 3. Secure the straps using the slots that can be found just below his/her shoulders.
4. Buckle it up together with the chest clip, and making sure that it creates a snug fit.
6. Look out for extra t-shirts, towels or blankets in the seats that may prevent a totally snug fit.
7. You can use the extra towels and blankets in case your child needs support, or there are still empty spaces on the seat.
8. If you notice that there’s still space between the groin and the buckle, use an extra diaper or towel to keep a snug fit.
9. It’s not recommended to put extra padding behind or under your baby unless this was suggested in the manual.
10. The chest clip should be placed at armpit level.
Reminders
When your child has outgrown his seat, you should transition to a larger and more secure seat, like a convertible or all-in-one car seat, and install this as a rear-facing car seat. These seats are designed with height and weight limits, thus allowing you to seat your baby rear-facing. If your child grows too tall or heavy and is still under one year of age, it’s recommended that you transition to a rear-facing car seat with higher limits.
A.2. Step-by-Step Process on How to Install Rear-Facing Infant Seats, Fitted with Lower Anchors
Best ways to Install Child Seat With Lower Anchors
1. Check the contents of the manufacturer’s manual before starting to work on this project. Focus on the location of lower anchors, and the steps on how to use and install the hardware.
2. When installing seats for kids, you want to provide the safest point inside the car. And based on tests, the back seat is the safest, thus it pays to set-up a rear-facing car seat for your child.
3. Find the lower anchors of the car.
4. Connect the lower anchors and the lower anchor attachments of the seat base.
5. Press it firmly to tighten the straps. By pressing the seat down, you can ensure a snug and secured fit. The idea here is to prevent movement during the actual travel.
6. Pay attention to the reclining angle of the seat.
7. When seated, your child should assume a semi-reclined position to allow regular breathing.
8. In most cases, the commercially-available seats will feature an angle indicator that can help you position the seat at the right angle. As your child grows, the angle of the seat should be adjusted to provide the right comfort and protection.
9. Once the right angle has been achieved, then that’s the right time to attach the carrier.
Learn How to Properly Fit your Child
1. Your child should be seated comfortably, with his back against the seat.
2. The harness straps should cross over his shoulders, making sure that the straps are flat. The straps should be threaded threw the slots that can be found below his shoulders.
3. Buckle up the harness including the chest clip, and making sure that it snugly fits.
4. Remove any blankets, towels or any materials that can prevent a snug fit.
5. If there are still empty spaces in the seat, you can fill this up using rolled towels.
6. And if you notice a space between your child’s groin and the buckle, you can insert a rolled towel or diaper.
7. Thick padding or any other material should not be used and placed under your baby especially if not advised by the manufacturer.
8. The chest clip should be placed at his armpit level. This can help hold and secure the straps.
Reminders
You will need to transition to an all-in-one or convertible car seats once your child has outgrown the his or her current seat, and use these as rear-facing seats. Convertible and the all-in-one seats feature higher weight and height limits, thus you can use these seats for a long period of time.
A.3 Step-by-Step Process on How to Install Your Next Convertible Car Seat, Rear-Facing
Best Ways to Install the Car Seat with Seat Belt
1. Read first the contents of the manufacturer’s manual before starting to work on the car seat. Learn more about the seat belt system, and understand the steps to take on how to lock your seat belt. Keep in mind that car seats and vehicles vary, thus you need to understand the right steps on how to install your chosen car seat.
2. Start by placing the seats at the back of the car, facing the rear.
3. Install the seat belt by threading through the belt path, making sure that the belt is flat.
4. Buckle and lock the seat belt.
5. Apply firm pressure on the seat to ensure a tight fit.
6. You will know that the seat has been installed and secured well if it will not move any direction.
7. You also need to make sure that the seat is not loose, and will not move back and forth when the car is traveling.
8. Another consideration is the correct recline angle of the seat.
9. Make sure that the baby is seated in a semi-reclined position to allow him to breath easily.
10. Some of the best rear-facing seats feature angle indicators that can help you check if the seat is at the correct angle.
11. The incline may be adjusted in time to meet the needs of your growing child.
Learn How to Properly Fit your Child
1. Once the seat has been secured, place your child in the seat, with his back flat against the seat.
2. Use the harness straps by making sure that the harness cover his shoulders. Also, the harness should be flat to avoid inconvenience, and should be threaded using the slots that can be found just below his shoulders.
3. Buckle the harness and chest clip, making sure that it is tight.
4. Extra clothes, towels and blankets on the seat may prevent a snug fit. Make it a point to buckle him up first before giving him the blankets.
5. If there are spaces in between, you can use rolled towels which can be placed on the side of his shoulders or head.
6. Also, if you notice a gap between his groin and the buckle, you can fill this up by using a rolled towel or diaper.
7. It is not suggested to place an extra padding under his seat, especially if this step is written in the manual.
8. The chest clip should be placed always at the armpit level for a secure hold of the straps.
Reminders
Pay attention to the contents of the manual, and make sure to use the rear-facing seats until such time they have reached the height and weight limits specified in the manual.
Convertible Car Seats, Rear-Facing, With Lower Anchors
Best Ways to Install Car Seats with Lower Anchors
1. Understand the contents of the manual, and keep an eye on the details and installation steps for lower anchors and other seat hardware.
2. Start by putting the seat in the back seat, positioned as a rear-facing seat.
3. Find the lower anchors.
4. Connect the lower anchors of your vehicle with the lower anchor and make sure that the straps are not twisted.
5. To secure the seat, press it down while also tighten the straps.
6. The seats are secured if it is not loose, and will not move easily from side to side, or front to back.
7. Check the angle of recline of the car seat.
8. Your baby should be seated in a reclined position to keep his airways open.
9. There are built-in indicators in many seats that can help in adjusting for the correct angle.
10. This angle may be re-adjusted to meet the requirements of your growing child.
Learn How to Properly Fit your Child
1. Seat the child with his back against the car seat.
2. Make sure that the harness runs through the shoulders and is flat and not twisted. The harness should be attached through the slots that can be found near his shoulders.
3. Buckle it up including the chest clip until it becomes snug.
4. Remove blankets or bulky clothing that can prevent a snug fit, making sure that your baby is buckled in first before adding his or her blanket.
5. If he/she needs extra support in the seats, you can fill the empty spaces with rolled towels or blanket.
6. If you notice a gap between the groin and the buckle, you can use a rolled towel or diaper to fill the spaces.
7. It is not recommended to put a towel or thick padding behind your baby unless the manufacturer of the car seat recommends it.
8. Always put the chest clip at his armpit level since this can help secure the harness in place.
Reminders
The manufacturer’s manual serves as an important resource for car owners and should be consulted EVERY time. Also, your child should use the rear-facing seat every time you travel until such time that they have reached the weight and height limits. And if that happens, he can now transition to forward-facing seat, fitted with tether and harness.
Sources:
www.nhtsa.gov
safercar.gov

Comments
Comments are closed.